One of the things I’ve been blithely telling our clients is that Microsoft Teams, which I like very much, has version control, which I had never tried. It turns out that finding version control is a bit more complex than I expected. Teams has version control, but you can’t get to it directly in the Teams application. It’s a little like asking for directions and hearing, “You can’t get there from here.”
What you must do to access version control in Teams is to open a document stored in Teams either in SharePoint or Word. This is simple. Teams has prominent buttons to get you either to SharePoint or Word. In the case of SharePoint, however, this is where your problems may begin.
Into the Woods
SharePoint, like so many Microsoft applications, is like a deep, dark, endless forest. It is easy to go wandering off and never be heard from again. The trick is to stay on the path. I could spend time here showing you how easy it is to get lost trying to use Teams version control in SharePoint, but life is short.
Take my word for it. If you must try it, however, select a Teams document on the Files page, and click on “Open in SharePoint” in the header up above the list of files. This will open the list of files as a SharePoint library, in a separate window. Find the file you want to use and click on the vertical row of dots between the “Name” and “Modified” columns. Scroll down to “Version history.” I leave the rest of this discovery to you.
Using Teams version control in Word is easy and useful, however, once you get through a couple of counterintuitive steps, which isn’t bad for Word. Your journey, once again, starts on the Files page of your Teams channel. This time, however, select the file with the little checkbox to the “Name” column’s left, then click on the three dots … at the right end of the file’s row. In the dropdown box, click on “Open in Word.”

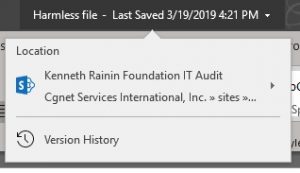
Clicking on the filename opens this box.
Once your file is open in Word, go up to the top of the window, in the middle, and click on the filename. A left click will drop down a box. Click on “Version History” in that box. This will open a section in the right part of the window called “Version History,” which will contain a list of all the versions. The current version is displayed to the left and listed on top. Click on any version below the current one, and it will open in a separate window. You now can examine the version. Up below the ribbon in this window is a choice to “Compare” or “Restore.”

Compare and Restore show up on the recalled document.
If you click “Restore,” it will restore the older file, as a new version with the current date and time.
Compare Beyond Compare
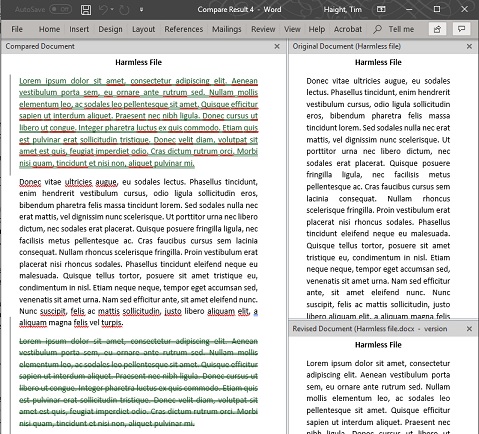
Even cooler, I think, is the “Compare” feature, which you can get at from the button next to “Restore” that I mentioned above, or also on the Word “Review” tab above the ribbon, and then in the Compare section of the Review ribbon. You can either compare or combine. “Combine” gives you a way to deal with putting changes in different versions or drafts into a single document.

Word’s “Compare” Feature
You get to see all the versions at once! If you’ve ever experienced the agony of having to do this with six edited drafts you got back in email, you can imagine how valuable this is.
Well, I guess we wandered off the path a little to find this treasure. Good luck finding your way back! At least we figured out how to use version control in Teams.


Great article. I have a follow up question though: when does Teams actually create a new version as there is no Save concept? Is it by time interval or by number of edits or other? Also, when does Teams create a major version vs. a minor version? I know how it works in SharePpoint but there you open a file in the native Office apps and not the online version, so it must be different. Appreciate any insight.