

Getting an approval on your work items is an essential part of almost every workflow. The approval might be a written acknowledgement from your manager, a more formal authorization from your board, or an official signature from a party outside your organization. Regardless of the type of approval needed, it can be hard to track and manage the requests when many systems and people are involved. This often leads to frustrating – and unnecessary — delays.
Well, I’m happy to tell you that you can now get faster feedback and results for your Teams-based projects with the new Microsoft Teams Approvals app. Everyone from frontline workers to corporate headquarters staff can easily create, manage, and share approvals directly from your hub for teamwork. Once you’ve installed the Teams Approvals app, the process becomes seamless and streamlined.
Create an approval request
You can quickly start an approval flow in Microsoft Teams from a chat or a channel conversation. Here’s how:
- Make sure you have the Approvals app installed in Microsoft Teams.
- At the bottom of the chat window, either click on the Approvals icon or select (…) More options, and then select Approvals from the listed apps.
- Fill in the name of the request, who needs to approve it, any additional info, and add an attachment if needed. Note: When you create an approval directly from a Teams chat, you can only add approvers that are already in the chat.
- Click Send. You’ll be able to view the request in the chat, or in the Approvals app hub.
You can also create an approval from within the Approvals app itself. Here’s how:
- Open the Approvals app in Microsoft Teams.
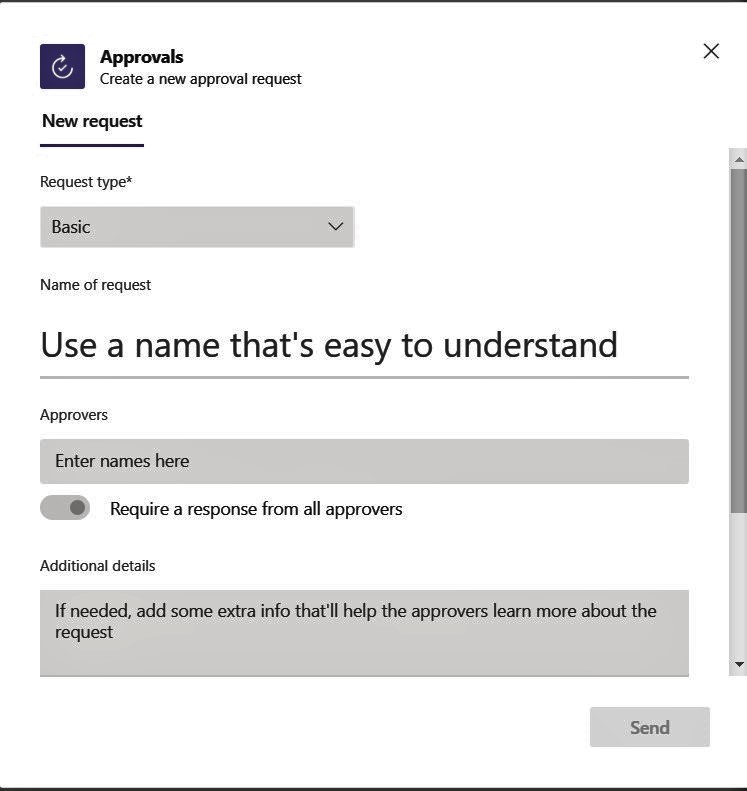
- Select New approval request.
- Fill in the name of the request, who needs to approve it, any additional info, and add an attachment if needed. You can even create custom responses to tailor your request to the needs of your business.
- Select Send. You’ll be able to view the request later by selecting Sent in the hub. Note: Approvals you create through Power Automate will appear in the hub, too.
Approve or reject a request
Once an approval is submitted, approvers are notified. They can quickly review the details of the request and any files included in the approval. If the request was submitted in a chat or a channel, an approvals card will be displayed with all the relevant actions you can take.
Track and manage your approvals
You can see and manage all your approvals from inside the Approvals app in Teams. Each request is displayed along with key details such as the status, source, requestor, and approvers. You can also select a specific approval to see some more information and track progress.
![]()
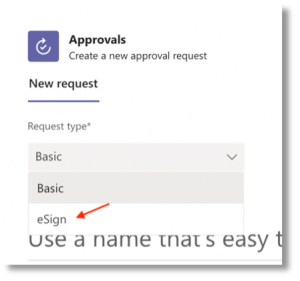
Capture electronic signatures
There may be times when you need something approved and recorded by more formal means. With this in mind, Microsoft worked closely with key partners earlier this year to enable the integration and management of electronic signatures. Users can now create an electronic signature approval using Adobe Sign, DocuSign and other 3rd party providers from within the Approval app. All you have to do is select your organization’s choice of e-signature provider during the initial Approval request.
Once submitted, signers are notified by email and can easily review and sign. With this new feature, approvers can add their signature without leaving Teams, allowing for a much faster approval process. When the approval process is completed, the information is stored in Teams and you can easily access the approval record and view the eSignatures.
Create an approval template
Microsoft recently rolled out another new feature in the Approvals app: templates. To streamline workflows, the new Approvals templates provide a reusable format for common forms like expense reports or overtime requests. Admins and team owners can use these as is or customize them.
They can also create new approval templates.
- From the overflow menu (available only to admins and team owners) click on “template management”.
- Enter the name of the new template, select the approvers, add in the necessary form fields and the workflow settings.
- When done, hit publish.
Once you create your first organizational template, it will create a new admin team. From there, you can add additional admins that can manage the organizational templates, right from the Approvals App.
Learn more about the Approvals app
If you want to learn more about the app and how to use it, spend a few minutes watching the Microsoft tutorial video here.


0 Comments