

To learn Teams, less is more. Learn posts, files, meetings, calls and chat, in that order, and you will have enough for a good start. You can learn the rest later. I know even that sounds like a lot, but, bear with me, I’ll show you why it’s not.
This post is obviously for beginners, but our sophisticated, regular readers might want to read and save this for when they must train somebody.
The Strategy
The minimalist approach I take here is based on this: Learning is pain. Consider, for example, when the sentence, “It was a learning experience,” is used. This is not to say that more knowledge is bad, but sometimes we overdo it. Certainly, learning new apps not of their own choice seems to be pain to users.
Why is this so? Consider, for example, the way people developing software work. In a big operation like Microsoft, hardly anybody is working alone on a new application. They’re working on features. What an ambitious coder wants is to have their feature included in the application, and for it to become a major reason why people choose the application.
The people in charge of the application act sort of like venture capitalists. They approve several features, knowing that many will fail, in the hope that one will define their product as the best. The consequence of this is “application bloat,” which is not a physical process, but the result of the social process described above.
What this means to you is that there are many, many features in most applications that you don’t need to do your job. Microsoft is notorious for this. A Microsoft application is like a deep, dark forest. Stray from a narrow path, and you will most likely get lost. This post describes the narrow path.
Another way to look at it is by comparing the learning curve of usual software training with the narrow path approach. Here, for example, is the first, introductory, diagram in the Dummies article on “How to Use Microsoft Teams”:
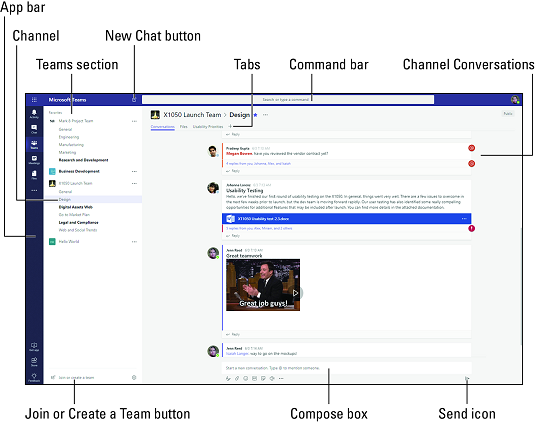
Be honest, now. Is your first reaction to this diagram for Dummies, “Wow, this is simple!” or “Oh, God…”? Imagine what the diagram not for Dummies looks like.
The Narrow Path
Trainers, and book authors, have motives like software developers. They want to pack in so much information that the purchasers think they’re getting their money’s worth, whether you absorb it or not.
Consider this: We can graph two learning curves, one with the approach of learning all the little features right away, and the Narrow Path approach, where you learn only the essentials at first and add the rest gradually when you need them. Comparing the two graphs looks like this:

You don’t want to overwhelm your hard-working neurons with more features than they can handle. Learn what you need to participate in your organization’s groups and leave the rest until you need it. Think of this as an 80-20 rule. This 20 percent of effort will give you 80 percent of what you need. You can ask somebody about the rest. They will feel important as they teach you.
The Details
Here we go, learning as little as possible.
Posts are the easiest. When you get into any team, you get a screen with this message at the bottom:

Click where it says, “Start,” and you will be able to type in a comment. Press return or click the little arrowhead (paper plane?) in the lower right. That’s all you must do to post.
If you want to attach a file to the post, click the little paperclip below the “Start” line. That will make a box pop up, like the one below.
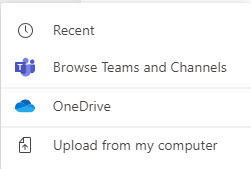
Usually, you’ll want to upload from your computer. When you click on that, you will get a pop-up of a usual Windows directory page. Sometimes, when you click on this you get a Teams directory instead. If so, just click “Cancel,” and try it again. It works right the second time.
The file you upload will also be stored in the Files section of the team (or, if you’re a stickler for nomenclature, the channel). Most Teams pages have a header menu like the one below. To get to Files, just click on it. After you’ve added an attachment to a comment, you will see it on the Files list.

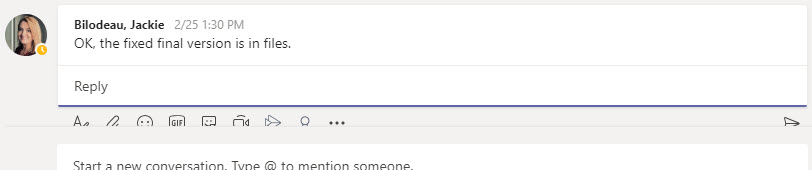
If you want to reply to a post, just click on “Reply” on the left below the post, as in the example below. Remember to click the paper plane at the right to send it. This can be tricky. If the post you’re replying to is at the bottom of the page, the correct paper plane may be hidden behind the “Start a new conversation” block. Just click in your reply and scroll down to expose the right paper plane.
Click on this Reply:
![]()
To get this (beware the hidden paper plane):
It is now time to get up, walk around and let your Learning Capacity recover. You could try practicing this to burn it in.
Files
Files are simple, too, and it’s unlikely you can avoid using them. It’s “document sharing,” right? When you click on the Files tab in the header, you see the Files page, the top of which looks like this:
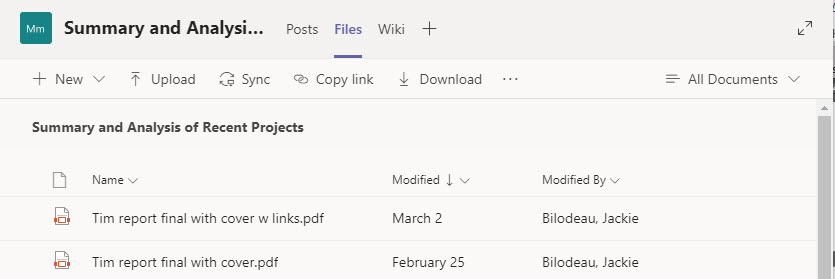
This channel is called “Summary and Analysis of Recent Projects.” Whatever the channel name is, it goes here. This is really like a regular Windows list of files. Just click on the name (not the icon) and the file will open.
Well, usually it will open. If it doesn’t, you’ll get something like this:

Pressing the “Download” button will download the file to the Downloads folder on your computer, and, if you have the corresponding application, you can open it from there.
If the file is one of those that Teams supports, the file will open in a window of its own, called the “Preview Window”. Here is what that window will look like, with a couple of buttons clicked:
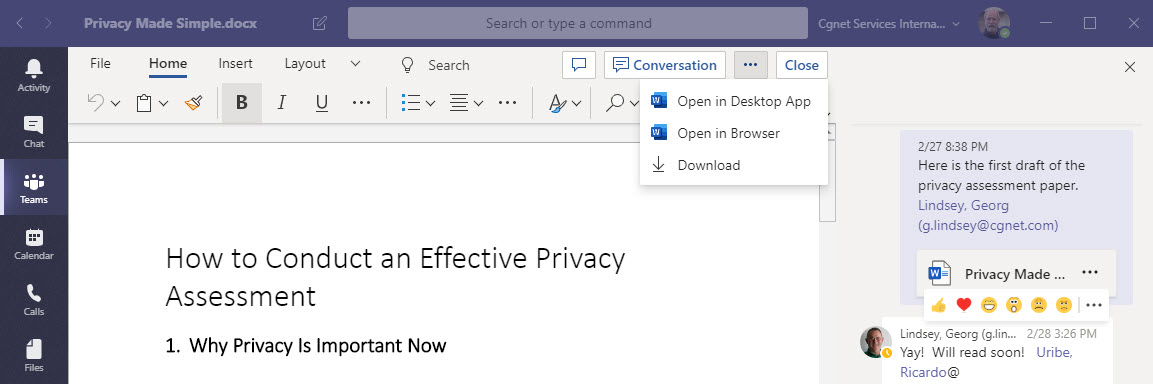
The two buttons clicked are “Conversation,” up at the top, and the legendary “…”. Conversation opens the column at the right, so you can chat with people while you work on a document or leave messages for them to read later. It’s a lot like “Comments” in Word. “…” opens the box just below it, with options like “Open in Desktop App.” This is what I usually use to work on a Word document, so I don’t have to learn how to use Word Online, which is what you get if you Open in Browser or do nothing.
When you open a Teams document in Word or most other Office apps, “Auto-save” will be on, and everything you type will be automatically, instantaneously, saved. Otherwise, it’s pretty much like regular Word. Just close it when you’re done.
Back on the Files page, you’ll notice other buttons at the top. I urge you to ignore most of them, but the Upload button is another way to get a file from your computer to the files list, and the Download button will put it in your local Downloads file.
There are all kinds of other things you can learn about files, such as how to edit them with other people in real time and how to recall previous versions, which have been automatically saved. But these are the things you can learn from the hotshots at work. If you must, however, you can read about many of them in the CGNET blog.
Meetings
I’m going to assume that you have a working microphone and camera on your computer. If not, you can pretty much get by with just the microphone, unless you want to share your screen. I like to use my video in meetings, really, unless I look like hell. It makes a slightly better emotional connection, I think. If you can’t figure out issues with camera or microphone, call tech support.
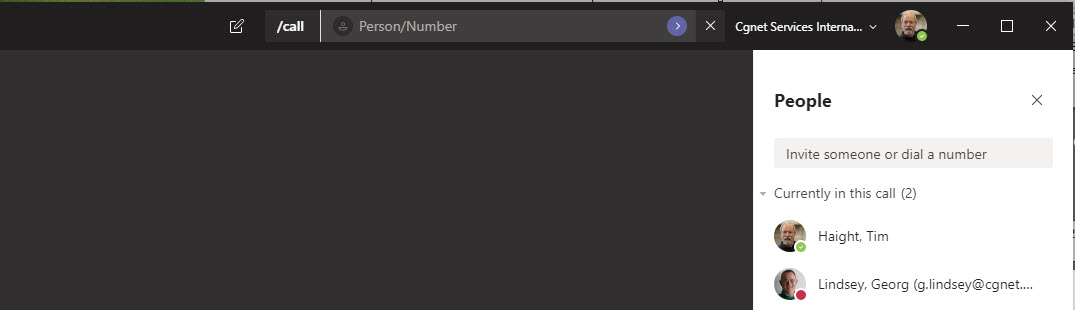
For one-to-one meetings you can simply call someone else on your organization’s Teams list, which, presumably, your IT department will have set up for you. You can start a call from any page by using the “Command Bar” at the top. It looks like this:
![]()
Type “/call” in here, and you will open the a Call box, where you can type in a name, email address, or, if you have dial-up service, the phone number you wish to call. The Call box looks like this:

Where it says “Person/Number,” type in the name or email address of somebody else you expect to be in your organization’s Teams list. That should start the call. If, like me, you’ve made some calls, you will get a drop-down list of recent calls.
For group meetings, you can either add people to a one-to-one call, or you can set up a meeting all at once. Adding people to a call looks like this:

This bar appears on the screen in a call. If you don’t see it, click on the screen. To add more people to the call, click on the Playmobil figures next to the red hang-up-phone button. That will give you this:
The People box appears at the upper right. Here you can see who’s already on the call, and you can invite additional people, one by one.
Above, in that bar on the screen, you also see the camera with a line across it. This means your camera is off. If you want to make it a video call, you click it. The person(s) on the other end have the same choice. Pretty simple.
 If you want to set up a whole meeting at once, you click on “Calendar.” The blue bar on the left is the Teams main navigation bar, which is the same on almost every page. By clicking on “Calendar,” you can get to the calendar.
The way to set up a meeting is to go to the Calendar page. This used to be called “Meetings,” but Microsoft, in its wisdom, changed it to Calendar. It seems every Microsoft app must have a calendar. I think it’s in somebody’s contract.
You can also get to the other main sections of Teams from here. “Activity” will show you the most recent posts and calls, across all your channels. When somebody adds something, a little number in a red ball will show up near the bell. This warns, uh, informs you that somebody is adding to your work.
“Files” will give you a list of the most recent files you’ve clicked on. “Teams” gives you a list of your teams and channels. “Chat” gives you a screen much like the “Posts” screen (I’ll skip the screenshot), but it allows conversations between you and one other person, rather than having to include everybody in a channel in your conversation.
The infamous “…” in this bar takes you off the path into the deep, dark woods. A similar icon called “Apps” appears in the bar near the bottom of the page, along with “Help.” The bar was too tall to fit nicely in this post, however. “All the news that fits we print.”
Back to Meetings
But I digress. Here is what you get if you click on “Calendar,” in search of a meeting.
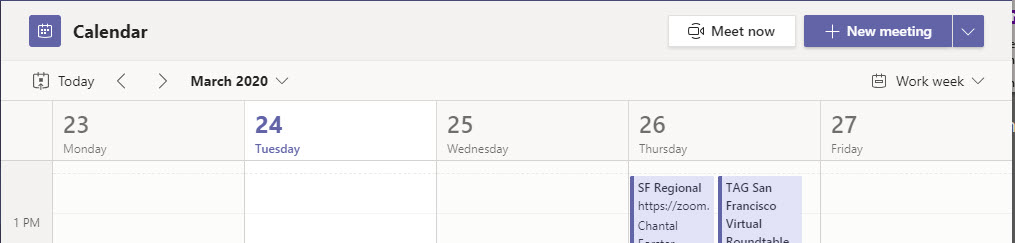
As you can see, meetings you should attend show up here. These have arrived here by way of Microsoft Outlook, which syncs your calendar there with Teams. You can also schedule future meetings here by clicking the “New Meeting” button. If you want to hold a meeting right away, click “Meet now.” That gives you this:

In this case, my camera is on. Before you enter the meeting, you can choose whether to have your camera or your microphone on or off.
You do that with the little iPhone-like buttons on the screen. The one between the camera and an the microphone is a handy little feature that blurs the background behind you.
I am looking grim here because this post is getting to tl;dr. I promise it will be over soon.
To add people to the meeting, you click “Join now.” That will put you into a meeting, alone, and you will have a People bar on the right like the one I mentioned above when you clicked the Playmobil figures.
Chat
I mentioned Chat above. Here’s our last screenshot:
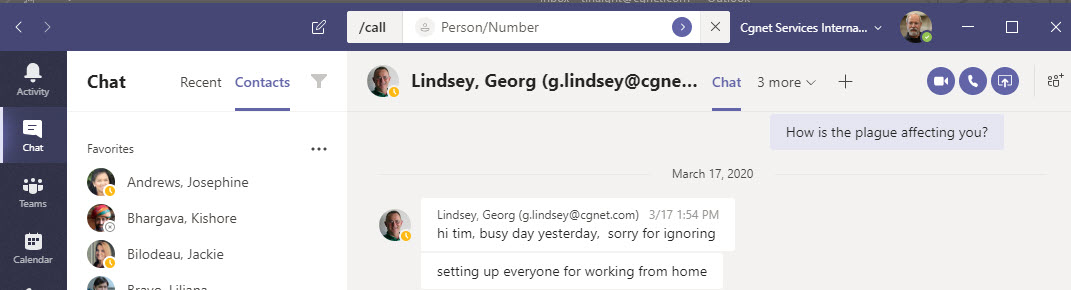
The Chat page imports your contacts from Outlook. It also keeps track of your recent chats. The chat itself is laid out like the popular format in most phones. As I mentioned above, you enter comments at the bottom the same way you do on the Posts page in each channel. You can also add files to a chat.
We’re Finally Done
This should be enough to get you started in Teams. Probably, it will cover most of what you will do in a normal organizational setting. The rest you can learn over time as your Learning Capacity permits.
If you want to be truly learning aversive, just bookmark this page and refer to it when your fifteen-minute meeting alarm goes off.
Oh, if you want a Teams app for your phone, you can get it from the Apple or Google app stores. But that’s another story.


0 Comments