A colleague wrote about using the Wiki tab in Microsoft Teams a couple of years ago when it was first introduced. Because of the ongoing popularity of that blog, we decided it was time for a fresh post on the subject. Hopefully by mastering the Wiki tab you’ll see a big boost in your team’s productivity.
What exactly is the Wiki tab?
Think of the Wiki tab as your digital notebook within Microsoft Teams. Here you can draft and edit notes and chat all in the same place. This is particularly helpful during a Teams meeting or chat in a channel, where the conversation may involve several participants. With the Wiki tab you can organize the notes from the meeting in a space where it can be saved, edited and accessed for future use. Far easier than searching through lengthy threads of chat messages to find a particular piece of information!
How to create a Wiki tab
While every Teams channel comes with a Wiki tab, you may have the occasion to need another one at some point. To add a new Wiki tab, click the + icon next to the other tab names in the top toolbar. Select the Wiki app from the tab gallery. Give the tab a unique name, and you’re ready to go.
Add your content
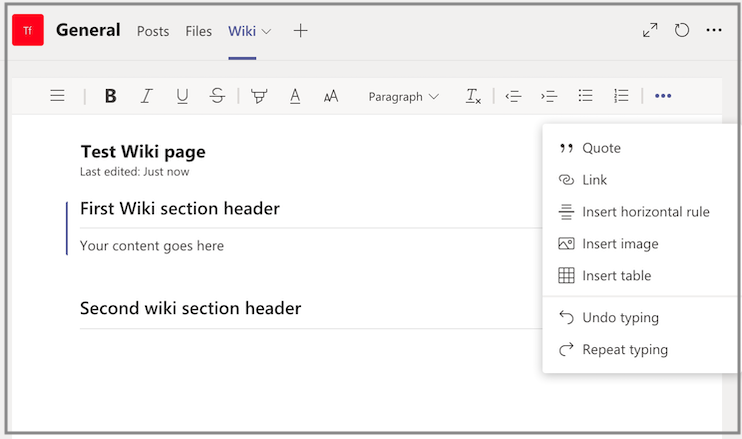
Each document within your Wiki tab is referred to as a page, and the page is made up of sections. Name your document, and then begin adding to your sections. Once your cursor is inside a section, the formatting toolbar appears.
Formatting
The Wiki tab comes with all the usual formatting options, such as bold, italic, underlined text, highlighting, and so on. You can use headers and do other paragraph formatting. And you can insert images, hyperlinks and tables as well.
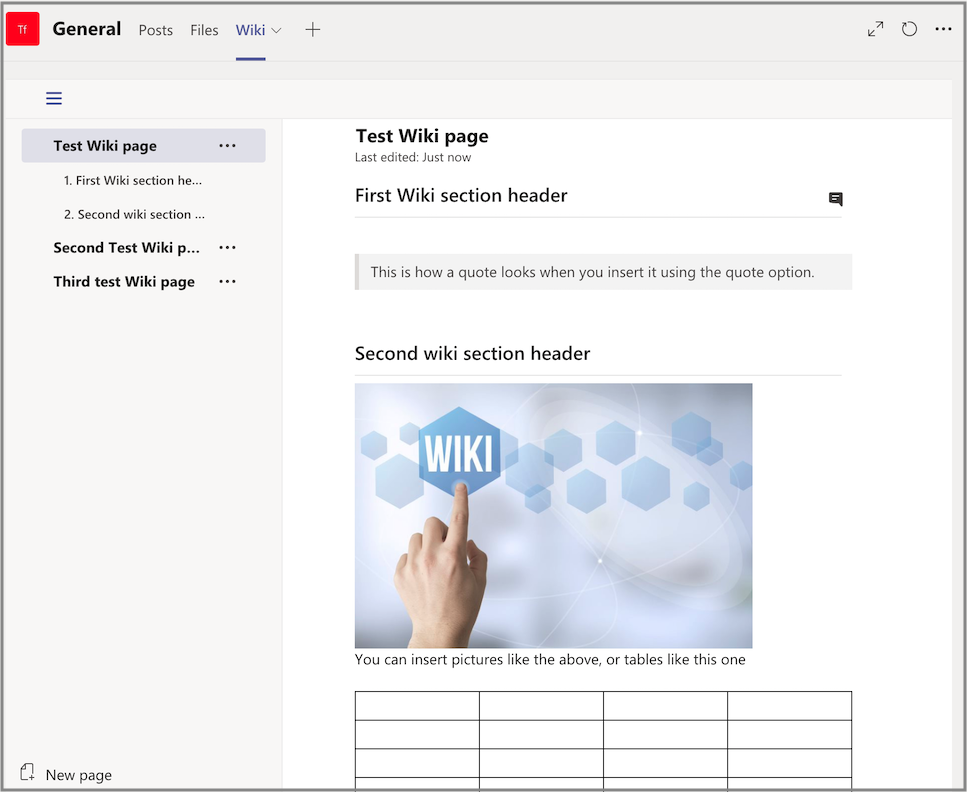
Table of Contents
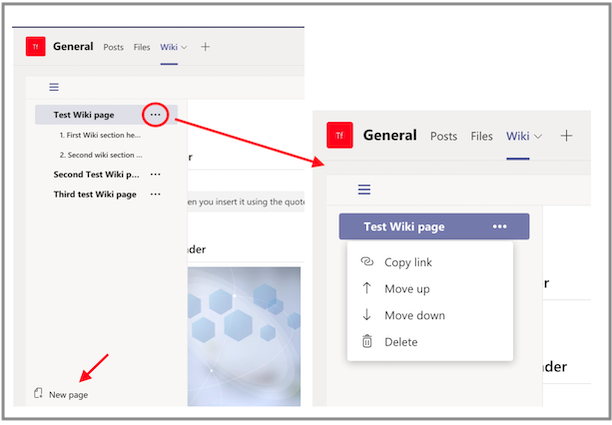
On the left side of your screen, you’ll see a table of contents (if you don’t see it, click the menu icon to open it). This helps you navigate quickly between pages and sections. You can also rearrange the sections either by dragging and dropping, or by clicking the ellipsis (…) and choosing the “move up” or “move down” option.
Adding New Sections or Pages
To add a new section you click the plus sign at the bottom of the editing page. To create another page entirely, the “New Page” icon is located at the bottom of the Table of Contents bar.
Note that a standard channel’s Wiki tab can be accessed by anyone on your team. A private channel’s Wiki tab is accessible only by members of that channel.
Start a conversation
You can easily initiate (or join) a chat inside your Wiki page by clicking the conversation icon to the right of any section. And you can get a specific person’s attention the same way you do in other parts of Teams, by using the @mention feature. The conversation window is a great place to share comments and ask questions specific to a particular section of your Wiki page. Even with the window closed, you’ll be able to tell if someone else has left comments because the icon turns from white to black.
Link it
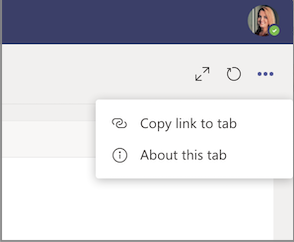
If you want to share a section of your Wiki page with someone, you simply hover over the section header until the “more options” icon appears. Click on “Copy link to tab” in that menu and it saves the hyperlink to your clipboard. Now you can paste it in a message to your colleague and they will be navigated to that section of your page with just a click.
Collaborative Editing
One final note about working with the Wiki tab: Anyone in the channel can add to or edit the content. When another team member is editing, you will see their picture and you will be locked out of that section, as only one person can edit a particular section at a time. However, the page itself can be worked on by multiple people as long as they are in different sections. As you might imagine, this greatly speeds up the process of getting your page finished.




Does the wiki have version control?
Can I see old versions or a record of changes in the past month for example?
No, the wiki tab does not have version control. OneNote can show you who made what changes. That might be a better alernative for you. Thanks for reading!